Step 1: Dedicated Google Workspace account
To ensure a smooth and uninterrupted integration with Gfacility, it is recommended to create a dedicated Google Workspace account that will be solely used for this purpose. This way, the integration will not depend on any real users within the company, and any changes made to those users' accounts will not affect the integration.
It's important to understand that the integration with Gfacility uses a 3-legged approach to connect to Google Workspace. This approach requires the user's consent and limits access to the data that the Gfacility Google Workspace account has access to.
Step 2: Assign permissions
After creating your Gfacility Google Workspace account, you can assign the necessary permissions to users via the Admin console. To do this, go to the Admin console, select Directory, then choose Users, and finally, select the Gfacility user and assign the required permissions.
Admin console -> Directory -> Users -> Gfacility user
Users
To ensure a smooth and successful user integration between Google Workspace and Gfacility, it is necessary to synchronize the Google Workspace directory with the Gfacility user directory. This synchronization requires the Gfacility Google Workspace account to have read permissions for users.
To assign the necessary permissions, you can either select an existing role that has the required permissions or create a custom role for Gfacility that has the appropriate permissions.
After selecting or creating the role, you can then choose the scope in Google Workspace. Depending on the specific requirements, you can have access to the entire organization or only to a specific organizational unit (OU). This will ensure that only the necessary user data is synced between Google Workspace and Gfacility, providing a more secure and efficient integration.

Resources
To ensure that the integration between Gfacility and Google Workspace is up-to-date, the synchronization of buildings and rooms from Google Workspace to Gfacility will occur once overnight.
Additionally, it's important to note that the Gfacility user must have read permissions for both buildings and resources that will be managed via Gfacility. This can be achieved by either assigning the user to each resource individually or adding the Gfacility user to an existing group that already has admin permissions for all resources. This will help ensure that the Gfacility user has the necessary permissions to manage the resources and that the integration works as intended.
Calendar events
The final integration for Gfacility is for room events, which will sync the events from the Google Calendar resources to Gfacility. This sync is required if you use the meeting room signages, scheduler or analytics.
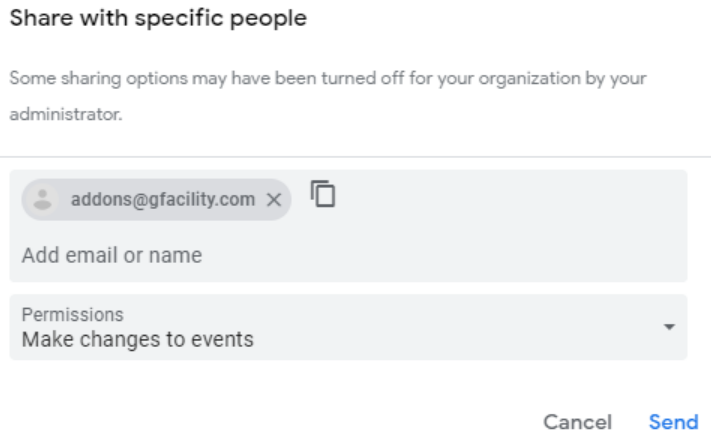
To ensure that this integration works correctly, the Gfacility Google Workspace account needs to have the 'Make changes to events' permission activated on the resource. This can be done by adding the Gfacility user to every resource individually or adding the Gfacility user to a group that has access to the necessary resources.

Step 3: Activate the integration
To activate the integrations, you need to first select the newly created Google Workspace account in the integration administration panel. To do this, go to the Google Workspace administration panel in Gfacility, and choose the newly created account as the integration account in the top-right corner. Once this has been done, you can activate each integration separately by clicking on the toggle button. When you activate the integration, a pop-up from Google will appear to confirm that you are providing access to Gfacility.
Admin console -> GoogleWorkspace
